The Story of A Cake: From Beginning to Eaten.
Just in case you were wondering how to make a cake from beginning to end, here is how! Its probably different than other blogs you've read. And it may not work for everyone, but here's how I do it!
Step 1: Clean your Kitchen
I know this seems self explanitory... but really a clean kitchen really makes the whole process a lot more fun. So... get started! Break out the broom, move your canisters, wipe everything down, and if you get really ambitious... tackle the fridge. You'll feel like you're hosting your own TV show when you start and you know what's in those canisters, and you can actually work without having to clean ketchup paintings off the fridge first! I'll wait...
Step 2: Know what your plan is
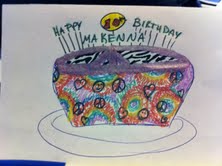
You should know what kind of cake, what decorations you want to make, and what frosting you are using. Once you plan that, sketch a picture (if your cake will be different than the one on the box...) Write out your grocery list if you need one. and Take a sip of tea after all that kitchen cleaning!
Gather groceries, and write your plan. What to do first? Write out the list step by step.
1.Bake Cake (This one will be chocolate) 2. Cool and wrap cakes 3. Make Fondant
4. Make filling 5. Make Frosting(fudge..mmm)
6. Make decorations (letters, number plaque, zebra fondant, and tie-dye fondant)
7. Color Frosting for piping, or frosting (white and black for small hearts and peace signs.
8. Cover cake board (Hmm..Scrapbook paper is good for this!)
9. If cake is cool, stack and carve if necessary(rounded cone shape on this one) 10. Fill, and crumb coat. (don't forget your icing dam!)
11. Chill.(really worth the wait time) 12. Fondant 13. Decorate (the best part!)
14. Take picture 15. Take 5~ 16. Clean up.
One thing to note, is that these elements and steps can be done on different days, or throughout the day. Some decorations may need to hold shape and sit until dry. Filling can often be frozen, as can Cake, and even fondant. Fondant decorations can last weeks if dried out properly, and can be made far in advance.
Step 3: Get crackin'!
Now that you know what you're in for... Grab your slippers and start in. I'll put up pictures as this cake goes together. If you run out of something, check out the Substitutions Page. If you need a recipe for anything, head over to recipes! Or check the Tips page for help!
Step 4: Baking the Cake
Follow the recipe. I know some of the steps (like scraping the bowl when it looks perfectly mixed, dry together, wet together) seem silly. But they usually serve a purpose! So grit your teeth and listen to you're 2nd grade teacher... Read the instructions before you begin. and then Follow them!
Because of the leavening agents in cake, you should make and bake the cake immediately. If you're making more than fits in your oven, only make what you can cook. The leavening agents like baking powder, work as soon as they are dampened, so the cake you leave sitting out, will also be flatter.
Let it cool! (Cover with a towel so dust or flies cant land on it! eew) The cake has to be all the way cooled before you can frost it, but you don't want it to dry out. If it is cool, wrap it in plastic until you're ready to assemble. (Note... don't attempt to make a webpage WHILE baking a cake... I am currently re-baking my cake since said leavening agents worked too well prior to entering the oven..........)
Step 5: Make all the other stuff
While the cake is cooling, its a good time to make your fondant, filling, and frosting. Or grab a cup of coffee... can you have too many breaks? Hmm... Okay back to work! If you finish making everything and the cake still needs time to cool, start your cake board. A few layers of cardboard covered in wrapping paper makes a great base. Plus you won't feel bad throwing out, or giving away your favorite crystal plate
Step 6: Make Decorations
Now if you haven't already, you can make all the decorations for the cake. Just remember that they don't have to be perfect, or you'll be there forever! Also, its always a good idea to make extra letters, or parts, and always save icing till after you finish and set up the cake. Just to be prepared :) I broke one of the letters putting the toothpick in!
Step 7: Frost the Cake
Now you can stack the cakes (sans filling at first), and then carve out any shape you need, cut off hard corners, and level any cakes that are super un-even and can't be fixed with extra filling (which no one ever complains about). Once the layers are all done, add a frosting dam (a ring of frosting 1/2" inside the edge of the cake that keeps the filling from seeping out), between each layer, and fill. Lightly press each layer of cake on the next evening slightly. Now you can crumb coat or "Dirty Ice" the cake, just put a layer of frosting on barely enough to coat, but it keeps the crumbs stuck to the cake. Then you can put a thicker layer of frosting on top of that. Let it sit to firm up a bit, and then freeze or chill as you prefer.
Step 8: Fondant the cake, and Decorate
Once the cake is frozen or chilled (this makes it a LOT easier to frost), you can lay the fondant out on top of the cake and lightly form the fondant to the cake. If you get wrinkles in the fondant just pick it back up and slowly stretch and press it down. Then you can use a pizza cutter to cut the excess off the bottom. If you can't get wrinkles out just press them as flat as possible and plan to put a flower there :) If you piece fondant together like I did, it will not be as strong, so you'll need to be a little careful with each seam. (I'm sure this is clear as mud)
Now, you can pull out the other decorations, and add them to your cake. One decoration at a time and the cake should start to look more finished (except for all the powdered stuff on the cake which we'll take care of later)! Take your time, have fun, and enjoy the best part of the experience! The almost done part! :)
Step 9: Finishing Steps
Now, its time to wipe off the cake board, and finish the cake by lightly painting the cake, or misting the cake with water. This will give it a sheen. If you want a matte look, dry brush the powdered sugar off the cake. You can add shimmer powder here, or leave it alone. Fill in any cracks with royal icing in the same color and smooth it down lightly with a spatula. Add accents, pipe decorations, take pictures, enjoy the experience!
Shh... not to be a bummer.. but you really should clean up before you take a break, its no fun to come back to a mess! The sugar in your nose is just helping your diet plan. (you won't want to eat the cake you helped make!) Okay I'm lying. you will, but really its better to finish cleaning first! :) (Don't shoot the messenger)
